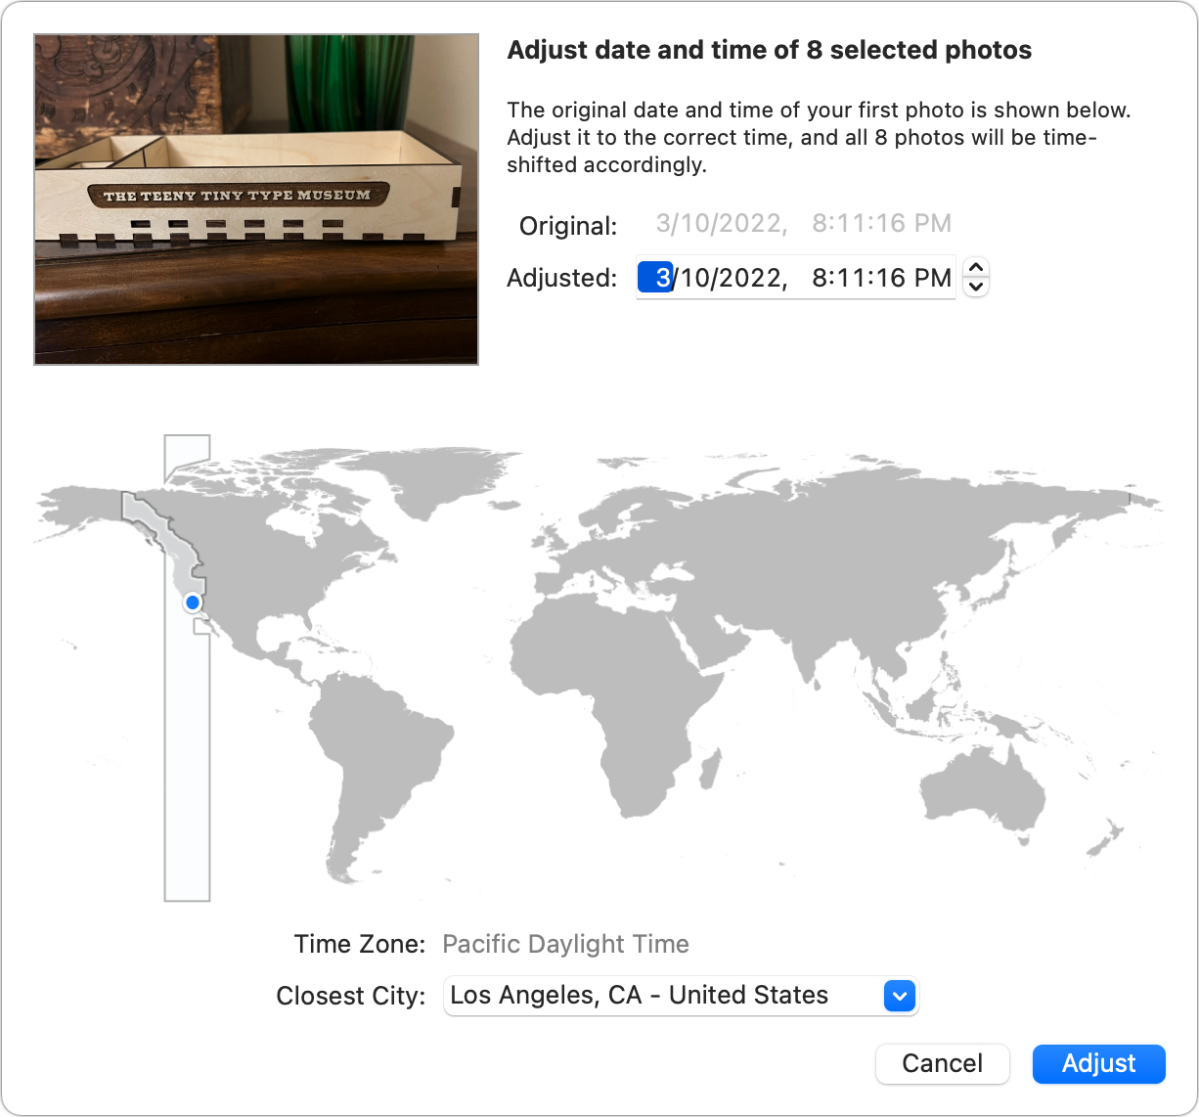
While Photos for macOS has improved considerably since its introduction several years ago, it still has some “third rail” features that you need to be careful about touching because they could be painful to fix. The worst of these is Image > Adjust Date and Time.
When used carefully, it’s a way to fix the incorrect date and time on a single photo or to adjust the offset for a group of photos. Say you had a camera set to the wrong time zone, date, or time of day—or all three. This was a frequent problem with older cameras that would reset to an arbitrary time if their battery ran out. But it’s easy to do today: just travel a few time zones or set the date incorrectly without noticing it.
This offset reveals itself in Photos when you pool images from different sources, like a camera and your iPhone, and they’re interleaved incorrectly. Or they’re just in the wrong place: hours, days, or years away from where you expect.
Adjust Date and Time lets you correct for this. Select a group of images and videos that are all wrong by the same amount, like 2 months, 5 hours, and 1 time zone. In the dialog, enter the correct first date and time; you can also change the time zone. Apple then adjusts all the images and videos by that factor, and it sets all the media to a different time zone if you selected one.
But what if you were to enter the wrong information? One reader sent their images about 2,000 years into the future, all 27,000 of them. Apple doesn’t offer an undo—there’s no way to click and reverse this operation.
The best solution is to reverse the offset. The Adjust Date and Time feature doesn’t set all selected media to a single date and time, but rather adjusts all the images by the same degree as the difference between the original and adjusted time of the first image.
Imagine you had three images in a selection taken in 1990 on January 14 at 5:30 pm, January 15 at 10:30 am, and January 20 at 8:01 pm. Set the adjusted date and time of the first image to April 20, 1983, at 8:30 pm, and those images would now be stamped in 1983 at April 20 at 8:30 pm, April 21 at 1:30 pm, and April 26 at 11:01 pm. Changing them back would be a matter of selecting the same set and entering the original capture time: January 14, 1990, at 5:30 pm.

Here’s how to reset the offset:
- Find the set of images that you set to the wrong offset if it’s not the entire library. You can use smart albums to identify a set of images that is out of the date range you normally deal with, for instance. (Choose File > New Smart Album and set criteria to each date range.)
- Select all the media in the set you want to reverse the offset on: Edit > Select All or press Command-A. (See note just below.)
- Choose Image > Adjust Date and Time. Note that Photos shows you the first image in your selected set.
- For the Adjusted time, enter the correct time for that image. (Don’t know that date and time? See below.) Click Adjust. Photos now corrects all the images.
If after following step 2 above, Photos won’t let you choose Adjust Date and Time in step 3 if you have any referenced media in the selection. If any are included, you have to fix or exclude them. Either create a new smart album that excludes them or import those referenced images and videos into your library. For more on that situation, read “How to make sure you don’t delete referenced images in Photos for macOS.”
If you don’t know the correct time for the image in step 4, follow these steps:
- Select the image in Photos.
- Choose File > Export > Export Unmodified Original for 1 Photo.
- Click Export and navigate to a location to save it.
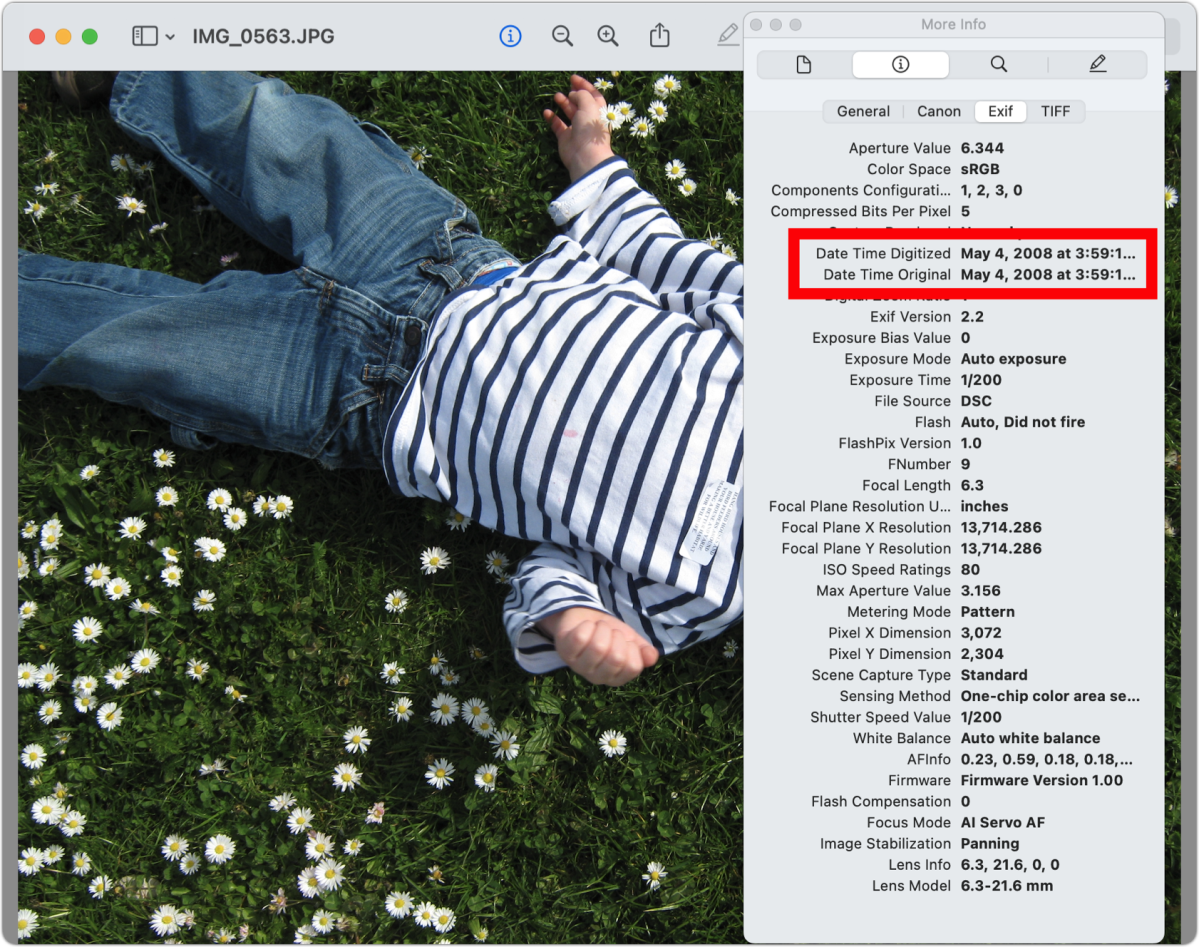
- Open the image in Preview.
- Choose Tools > Show Inspector.
- Click the i info tab and click the EXIF button.
- Look for the information noted for Date Time Original or similar and make a note of it.
Yes, it’s ironic that you have to open a different Apple app to get the information you need.

If the above is too fussy for you, if you find that you have too many different sets of offset images, or if there’s worse weirdness going on that you think could be some sort of correction, you can also turn to a backup. However, if iCloud Photos is enabled, the backup can only work if the iCloud setting in Photos > Preferences > iCloud is set to download full-resolution images as described in “How to make a local backup of your iCloud Photos synced library.” If iCloud Photos is set to optimized, there’s no way to reverse.
This Mac 911 article is in response to a question submitted by Macworld reader Alberto.
Ask Mac 911
We’ve compiled a list of the questions we get asked most frequently, along with answers and links to columns: read our super FAQ to see if your question is covered. If not, we’re always looking for new problems to solve! Email yours to mac911@macworld.com, including screen captures as appropriate and whether you want your full name used. Not every question will be answered, we don’t reply to email, and we cannot provide direct troubleshooting advice.
from Macworld.com https://ift.tt/qzlVjQ0
via IFTTT


0 Comments