The brittleness of the Apple ID account management system can lead to some funny but common situations. Picture the following that a reader asked about:
- You share an Apple ID with someone else or more than one person.
- You use iCloud email aliases to allow each of you to have your own account in effect.
- But you now want separate Apple IDs. What happens to the email address? And all the stuff you’ve collectively purchased?
There’s a solution for both.
Forward your iCloud email
Whether an iCloud address is in use for email or as the primary/login email on an Apple ID account, you can’t migrate it to another account. (There is a method if you’re using a non-Apple address for your Apple ID login; read “How to shift an email address from one Apple ID to another.”)
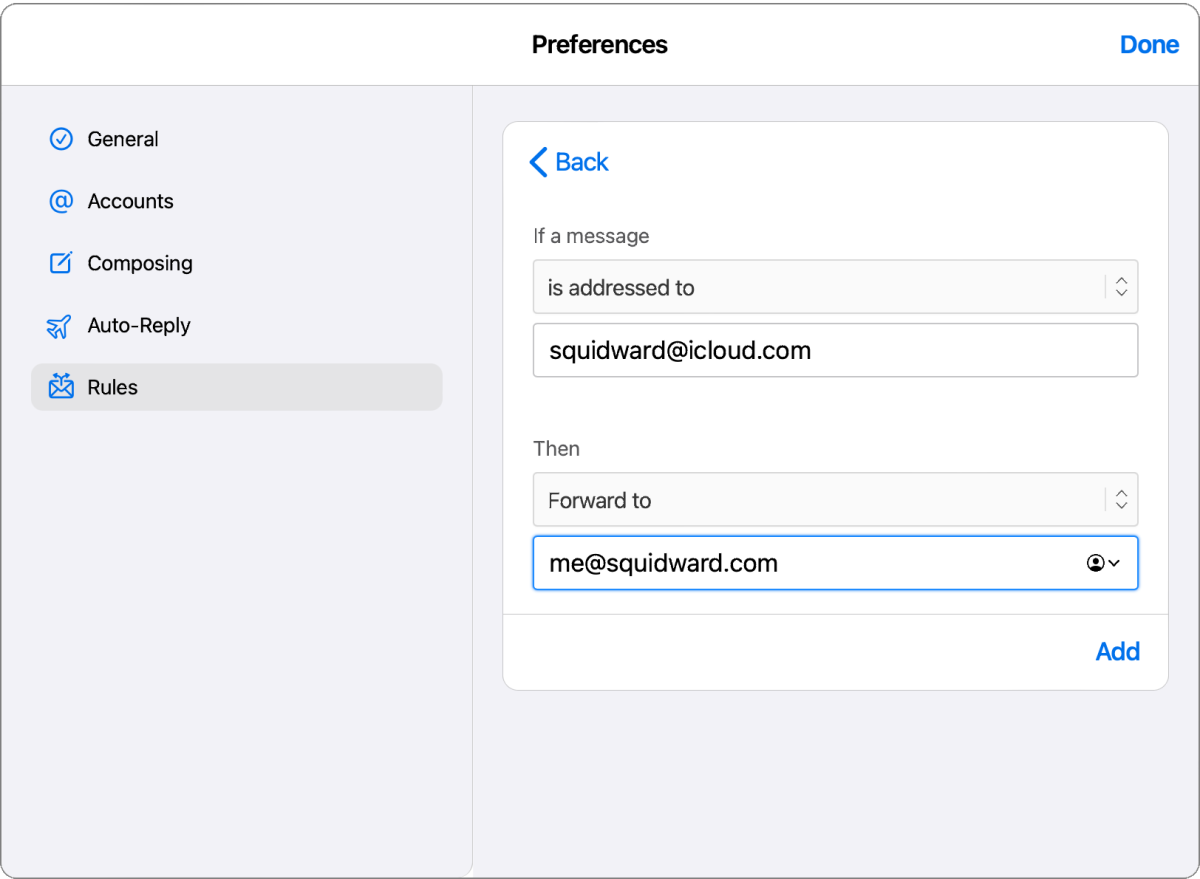
But you can forward incoming email by filtering on the alias. That’s what some people already do to share an Apple ID. Here’s how if you haven’t already set this up:
- Create a new Apple ID account or an email account at another host.
- Log in at icloud.com and click Mail.
- Click the gear icon at the top of the left-hand Mailboxes list
- Select Preferences and then click Rules.
- Click “Add rule.”
- Select the option for “If a message” as “is addressed to” and fill in the full iCloud address, like
example@icloud.com. - Below the Then label, select “Forward to” and enter the full address for forwarding email, like
person@example.com. - Click Add and then click Done.

Because this rule operates at icloud.com, it runs without any need to have mail pass through a mail app on any of your devices. It’s seamless and works forever.
If I were the person having my email forwarded, I would tell all my correspondents about my new address and update it as part of my login at other sites. Apple might be brittle about that, but most sites and services are not.
You can use rules in Apple’s Mail app for macOS (and others) to let you know which incoming messages are sent to the forwarded address to make it easier to know who is using your old email. Follow these steps:
- In Mail for macOS, choose Mail > Preferences > Rules.
- Click Add Rule and name the rule “Mark forwarded email.”
- Below the “If [any] of the following conditions are met,” set the fields to “To,” “is equal to,” and the address that you’re having email forwarded from.
- Under “Perform the following actions,” set the fields to “Set Color,” “of background,” and a color you pick.
- Click OK.
You can now see at a glance which senders require news of your new address.
Share, not transfer, purchases and related content
Apple doesn’t allow any transfer of items downloaded at no cost or paid for through its digital stores to other Apple ID accounts. But Family Sharing provides a solution for most purposes in most cases. Family Sharing can reduce costs for Apple services through Apple One bundles, and it lets you opt to share apps and media as well as draw privately from a shared pool of iCloud storage.

There are few privacy concerns among adults using Family Sharing because all data is kept private, and no purchases or information is shared without you enabling a sharing or choosing to post something, like an event. For instance, Family Sharing creates a common calendar, but you’re not required to add entries to it. And your portion of the pooled iCloud storage is inaccessible to anyone else in the group.
The only major drawback is that the person who sets up Family Sharing, the Organizer, becomes the sole source of payment for all purchases. Whatever method they set for payment is the only one that can be used by all group members. This may not work in all circumstances.
If you want to turn on Family Sharing after migrating one or more people to their own Apple ID accounts, you have to set it up in iOS, iPadOS, or macOS from the device of the person who becomes the Organizer. Follow Apple’s directions.
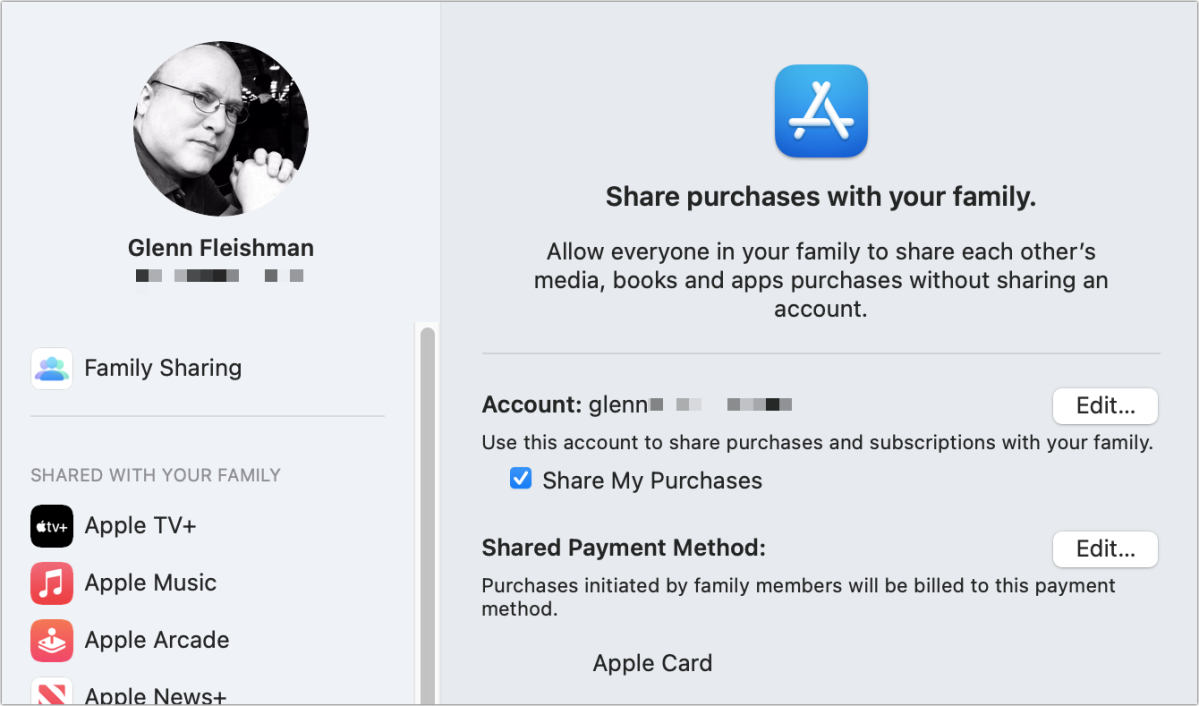
Once enabled, make sure that Purchase Sharing is enabled:
- In iOS/iPad, go to Settings > account name > Family Sharing > Purchase Sharing. Share Purchases with Family should be enabled.
- In macOS, go to System Preferences > Family Sharing and click Purchase Sharing. The Share My Purchases box should be checked.
Apple provides an exhaustive list of what can and can’t be shared this way, but it includes Apple digital subscriptions (some require a family version) and nearly everything purchased from an Apple digital store, including books, apps, music, TV shows episodes, and movies. Some developers also allow sharing subscriptions and in-app purchases as long as they aren’t consumable, like game tokens.
To access shared items, you may need to visit a special section of an Apple app. For instance, to install shared apps in the App Store:
- In iOS/iPadOS, open the App Store app, tap your profile image, and then tap Purchased. You can tap another group member’s name to choose among their purchases.
- In macOS, open the App Store app, click your initials or name in the lower-left corner, and choose another group member’s name from the “Purchased by” popup menu. Your name appears selected by default.
This Mac 911 article is in response to a question submitted by Macworld reader Joseph.
Ask Mac 911
We’ve compiled a list of the questions we get asked most frequently, along with answers and links to columns: read our super FAQ to see if your question is covered. If not, we’re always looking for new problems to solve! Email yours to mac911@macworld.com, including screen captures as appropriate and whether you want your full name used. Not every question will be answered, we don’t reply to email, and we cannot provide direct troubleshooting advice.
from Macworld.com https://ift.tt/OscJirx
via IFTTT