Macs are fantastic devices for kids to use to explore the internet and take their first steps in what will probably be a life-long relationship with technology. But, of course, this can also open them up to a whole world of content that might not be appropriate or advisable. To prevent such dangers, Apple includes a range of parental controls in macOS that allows you to restrict the kind of content they see and determine how long they can use the device.
Clearly Parental Controls are a useful part of macOS, but actually finding them has been a bit more difficult since macOS Catalina. Prior to Catalina these useful settings were found in the Parental Control section of System Preferences. Since Catalina Apple has hidden Parental Controls in the Screen Time section of System Preferences.
We show you how to create a child’s account and set up parental controls on your Mac so your little ones can be safe while using macOS, plus recommend a few third-party apps that offer additional security.
Step 1: Set up a child account on a Mac
The first step is to create a dedicated account for your child so that any restrictions you implement don’t end up affecting your own browsing or app usage. The method for setting up an account for your child is slightly different depending on the version of macOS you are using.
macOS Catalina and later:
- Go to System Preferences > Users & Groups.
- Click on the lock to make changes – enter your password when prompted.
- Click on + to add new accounts from there.
- Give the account a name and password (you can also add a password hint).
- Choose Standard as the type of account.
- Click on Create User.
macOS Mojave or earlier:
- Go to System Preferences > Parental Controls.
- Create a child’s account – the steps are the similar to those above.
PROMOTION
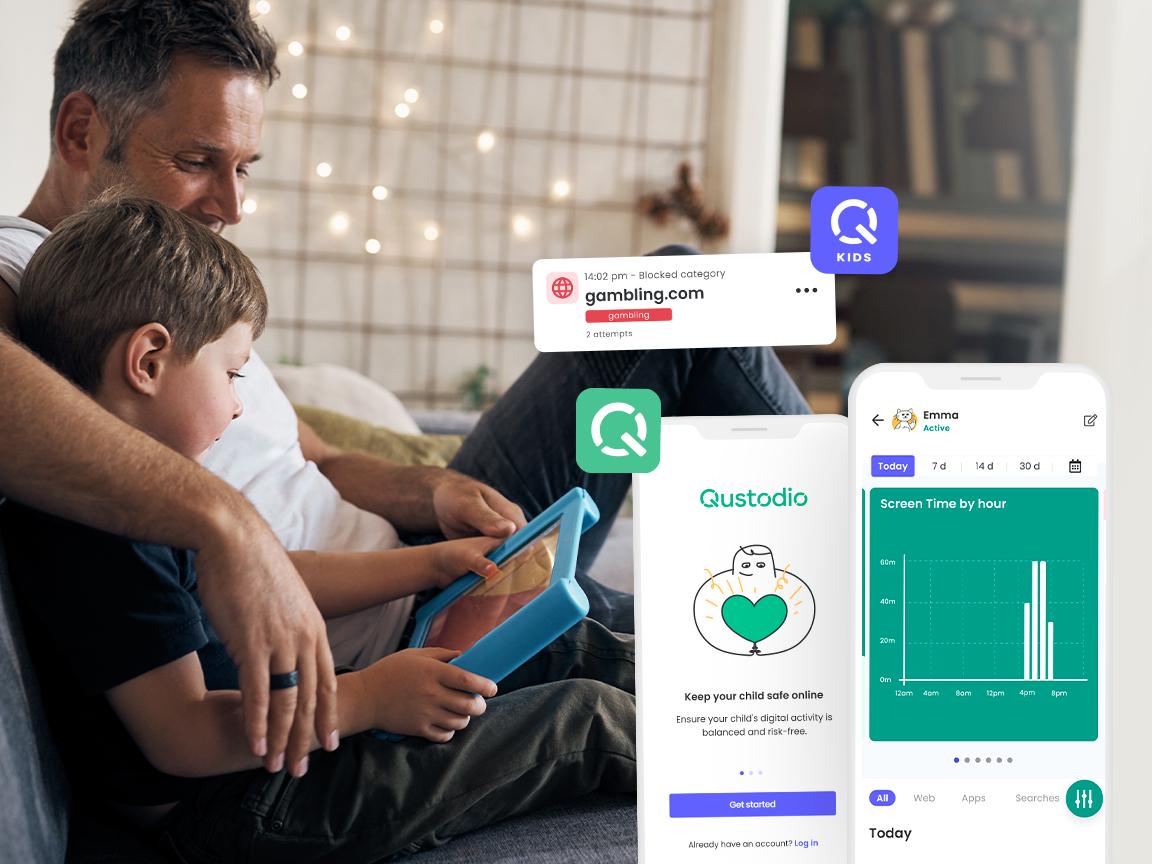
Qustodio™ Parental Control
- Promo Code: MACWORLD10
One app to help parents with their kid’s digital well-being: Set screen time, monitor SMS, control games & apps, get a direct alert with the panic button, and keep track of your kid’s location.
Step 2: Set up Family Sharing
The best way to safeguard your child is to use the Family Sharing feature. Family Sharing allows you to administer settings for the whole family (up to five members) from any of your Apple devices.
Each family member will need to be signed in with their Apple ID to use Family Sharing. Luckily it is easy to set your child up with an Apple ID, but if you’d rather not don’t worry, there are other ways to manage them as we will demonstrate below.
To set up Family Sharing follow these steps:
- Open System Preferences > Family Sharing.
- Click on the + below the Family section.
- Click on Create Child Account.
- Click Next.
- You will need to give Parental Consent – which essentially requires you to attach the security code for the card associated with your account.
- Enter your child’s information (you can create a free iCloud email address for them).
- Agree to the Ts&Cs.
- Agree that your child will use Ask to Buy (otherwise they can spend your money!). Click Continue.
- Agree to share your child’s location if you want to see their location according to where the device assigned to them is.
For more information read our complete guide to the advantages and capabilities of Family Sharing: How to set up Family Sharing on iPad, iPhone & Mac.
Step 3a: Set up Parental Controls (if using Family Sharing)
If you have set up Family Sharing (above) follow these steps to set up Parental Controls on a Mac:
- Make sure you are logged into your Apple ID.
- Open System Preferences > Screen Time.
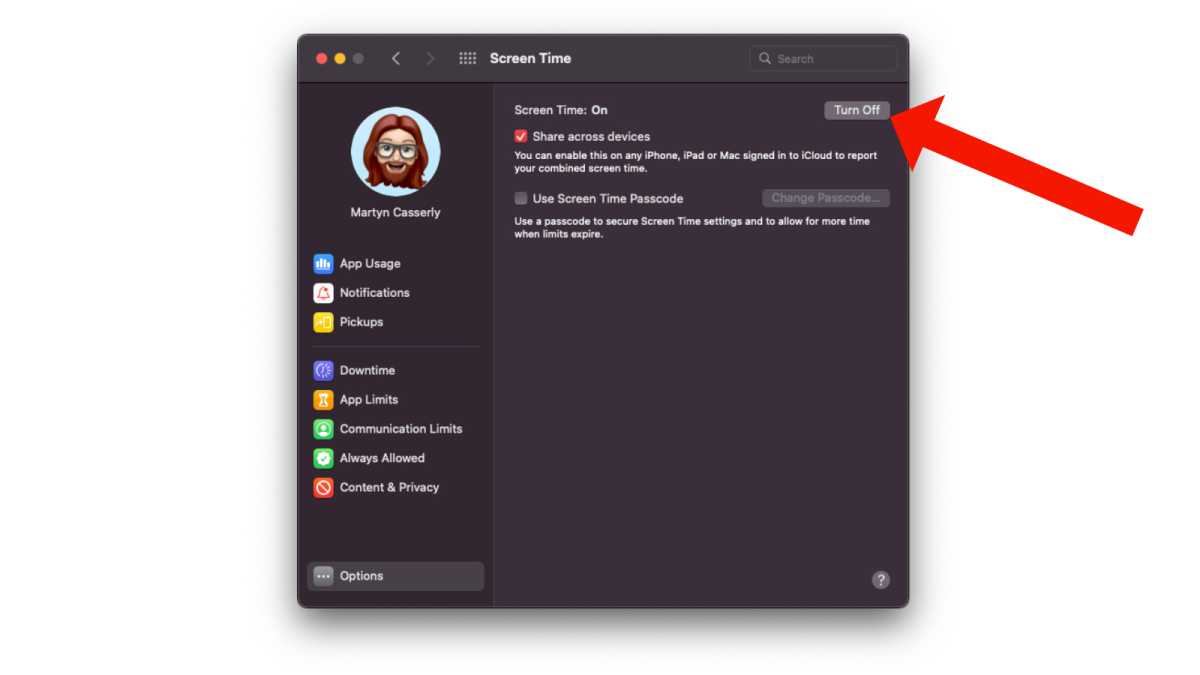
- Click on Options and select Share across devices (this will mean you are able to manage settings everywhere).
- Click on the drop down menu below your picture and choose the child you added to Family Sharing.
- Click Turn On to turn on Screen Time. (If you don’t see this click Options again).
- Select Include Website Data (if you want to see where they are visiting).
- Select Use Screen Time Passcode (if you want to manage extending Screen Time with a passcode).
In the column on the left you will find more options. We will discuss them in detail below.
Martyn Casserly
Step 3b: Set up Parental Controls (if not using Family Sharing)
If you prefer not to go the Family Sharing route you can still set up Parental Controls via the child’s account on the Mac. The approach is slightly different depending on the version of macOS you’re running.
Start by logging into your child’s Mac user account: Click on the Apple logo and log out, then log in again as them. If macOS takes you through the set up options just ignore and skip things like set up Apple ID if you’d rather not do that now.
macOS Catalina and later:
If you’re using macOS Monterey or any of the versions back as far as Catalina follow these steps:
- Go to System Preferences > Screen Time.
- Click on Options. You should see a message that Screen Time for this Mac is On. (If it isn’t turn it on).
- You can select Use Screen Time Passcode (if you want to manage extending Screen Time with a passcode).
macOS Mojave and earlier:
- Instead of Screen Time choose Parental Controls. (Not all of the options will be available though – most notably Screen Time options will be absent).
As with the Family Sharing method you will see a number of other options, including Downtime, App Limits, and Content & Privacy, in the left-hand column. We will discuss you to tailor these restrictions next.
The two options offered in the Screen Time pane are Share across devices and Use Screen Time Passcode.
- Share across devices will show you the combined time the account holder spends on their various Apple devices.
- Use Screen Time Passcode is one that you should turn on immediately as it prevents children from changing any time limits or content locks you set up.
Step 4: Refine your Parental Controls
With these settings in place it’s time to start configuring the various Screen Time elements. Next we will run through the various controls including Downtime, App Limits, and Content & Privacy so you can tailor them to your needs. These setting are the same whether of not you go through Family Sharing.
Downtime
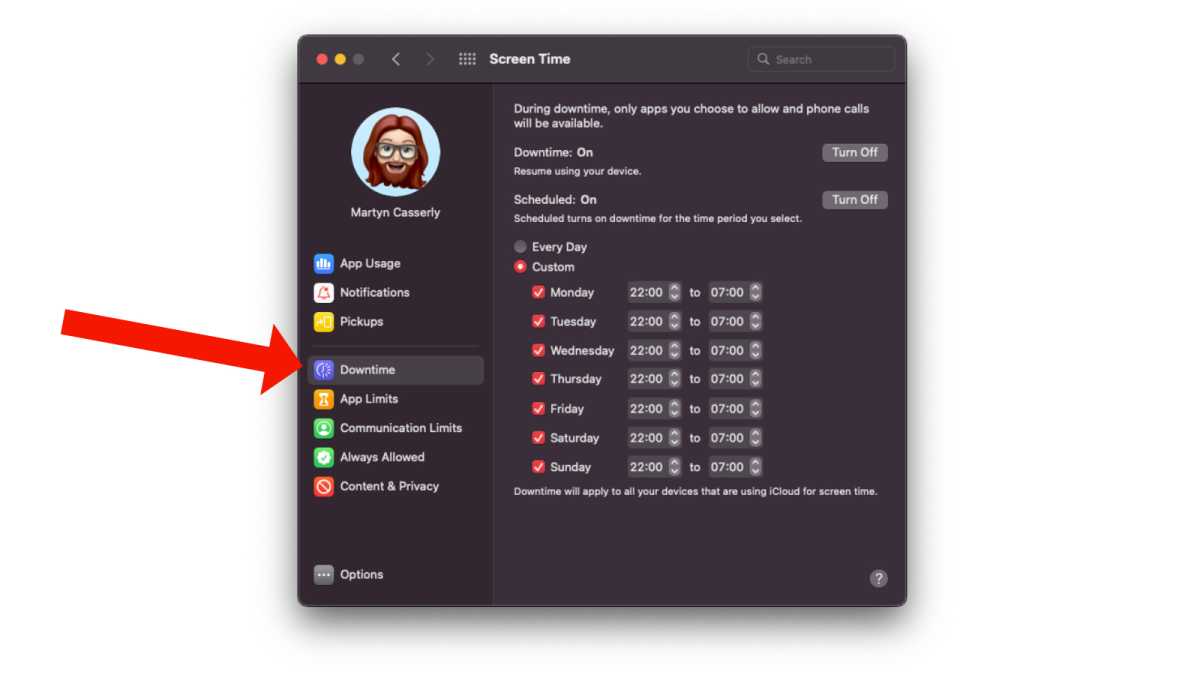
Downtime lets you set the times when the Mac will be unavailable to the user. This is useful if you want to restrict a child watching Netflix late at night or just prefer them to be away from screens at certain times. (For Downtime to work the devices your child uses will need to be updated to a recent version of macOS and other Apple OSs)
- Click on Downtime.
- Turn on Downtime (if you set a passcode you will need to enter it).
- Turn on Scheduled to specify the times when the device can be used. Choose either Every Day or Custom options and set the hours within which the Mac will be locked.
- Click on Block at Downtime to stop your child using the devices outside of these times.
Martyn Casserly
App Limits
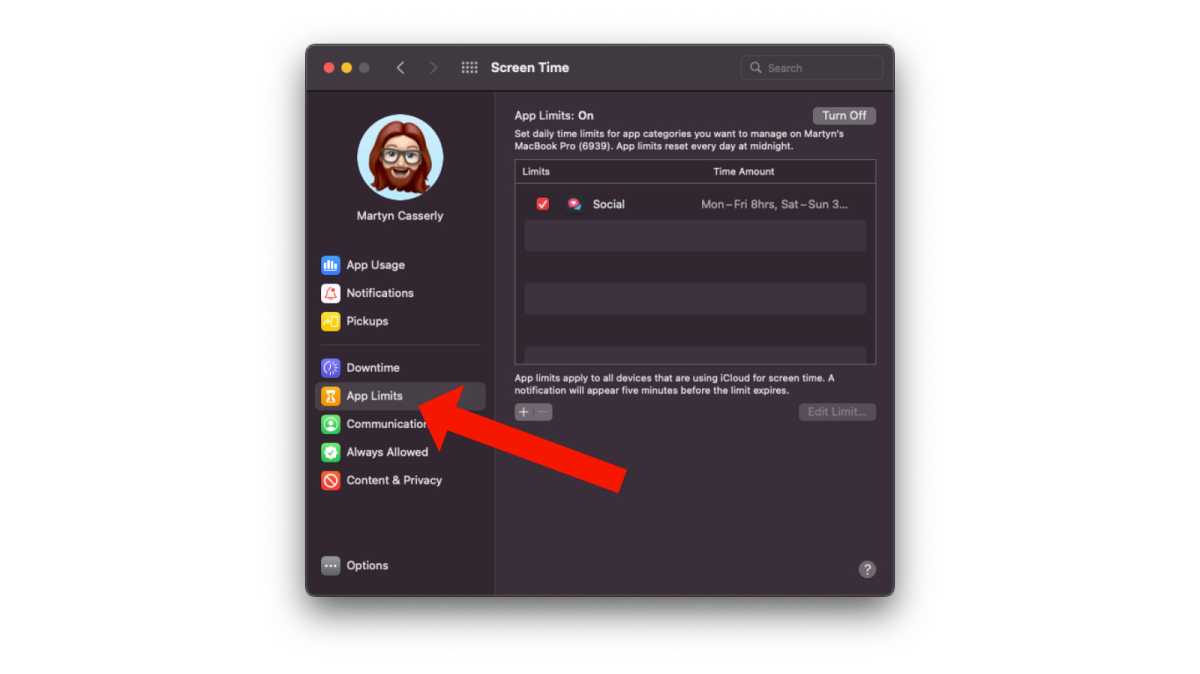
As the name suggests, this setting gives you control over how much time your children spend each day on certain apps or app categories.
- Click on App Limits.
- Click the ‘+’ icon in the bottom left of the main pane (enter the pincode).
- You’ll now be able to select particular apps or genres and apply daily time limits. One area where you may wish to moderate is Websites, which you will find at the bottom of the list.
- Click on the drop down arrow beside Websites and + to add websites you wish to limit access to. (Note there are more options for limiting website access in the Content & Privacy section).
Martyn Casserly
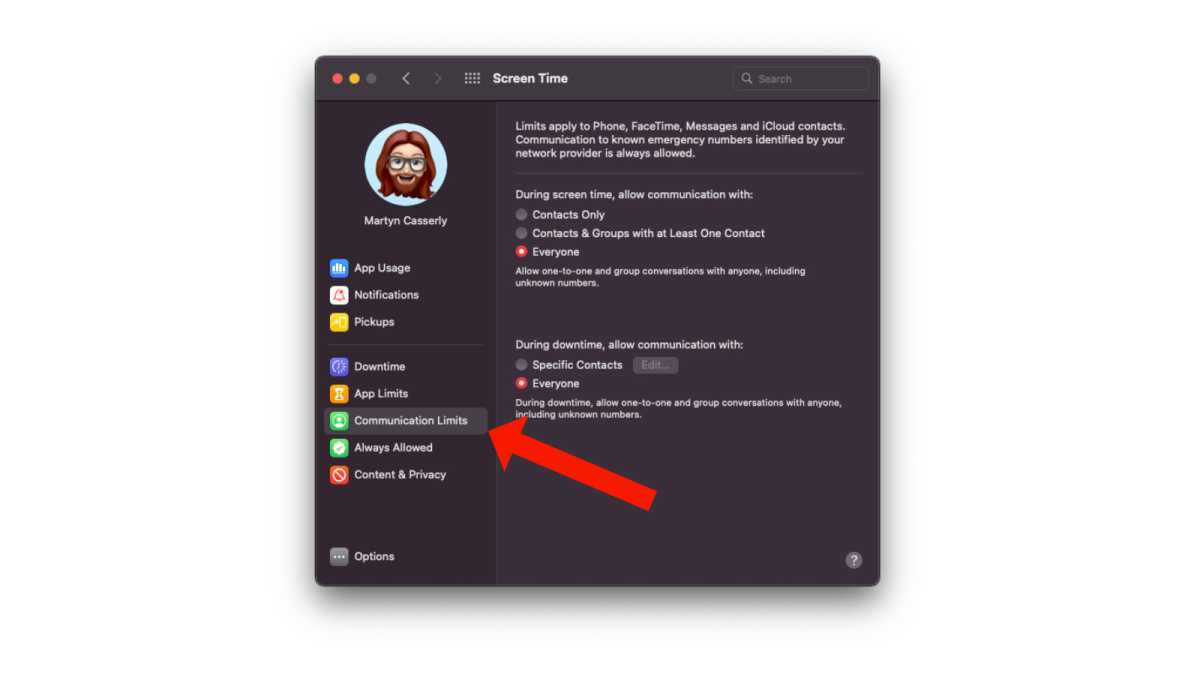
Communication Limits
This setting doesn’t limit which content can be accessed, but rather who your children can talk with during the Screen Time hours. You can restrict it to existing contacts (probably recommended) or anyone. There’s also a section for when Downtime is in force. Basically, if you want them to do their homework without being distracted by chatting to friends, this is where you can set it up.
Martyn Casserly
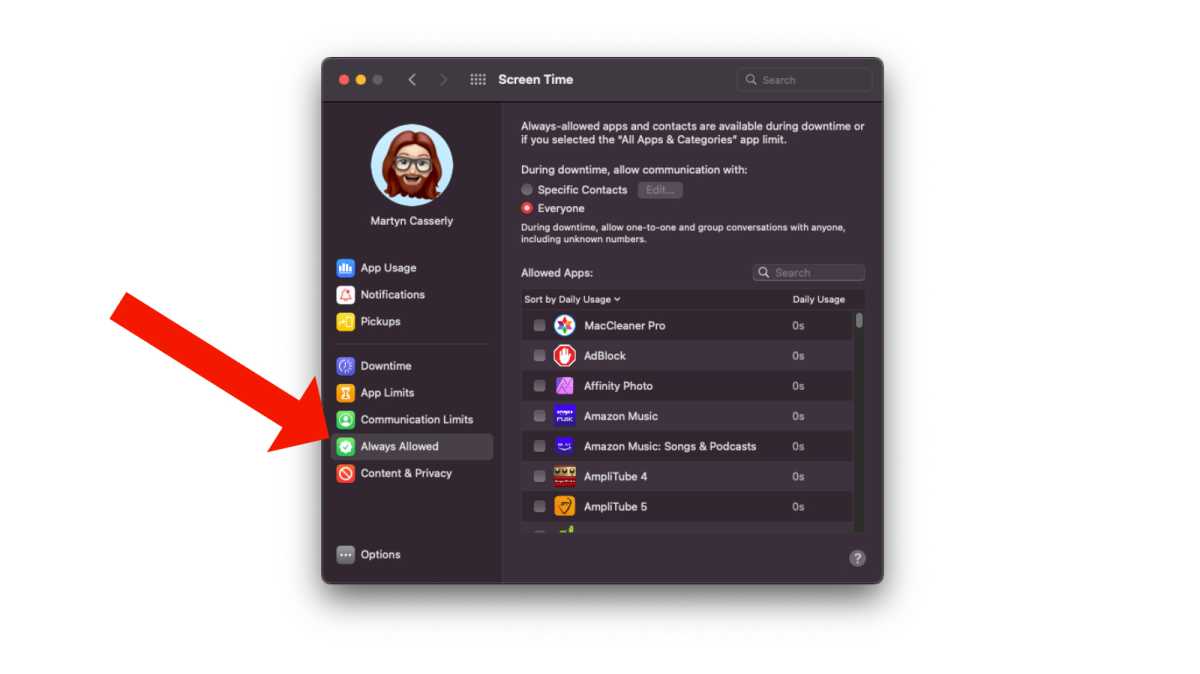
Always Allowed
Another straightforward setting, this will override both Downtime and App Limits, granting access to particular apps at all times.
- You need to go through the list of apps granting permission for any your want your child to have access to.
Martyn Casserly
Step 5: Set up website restrictions and bans
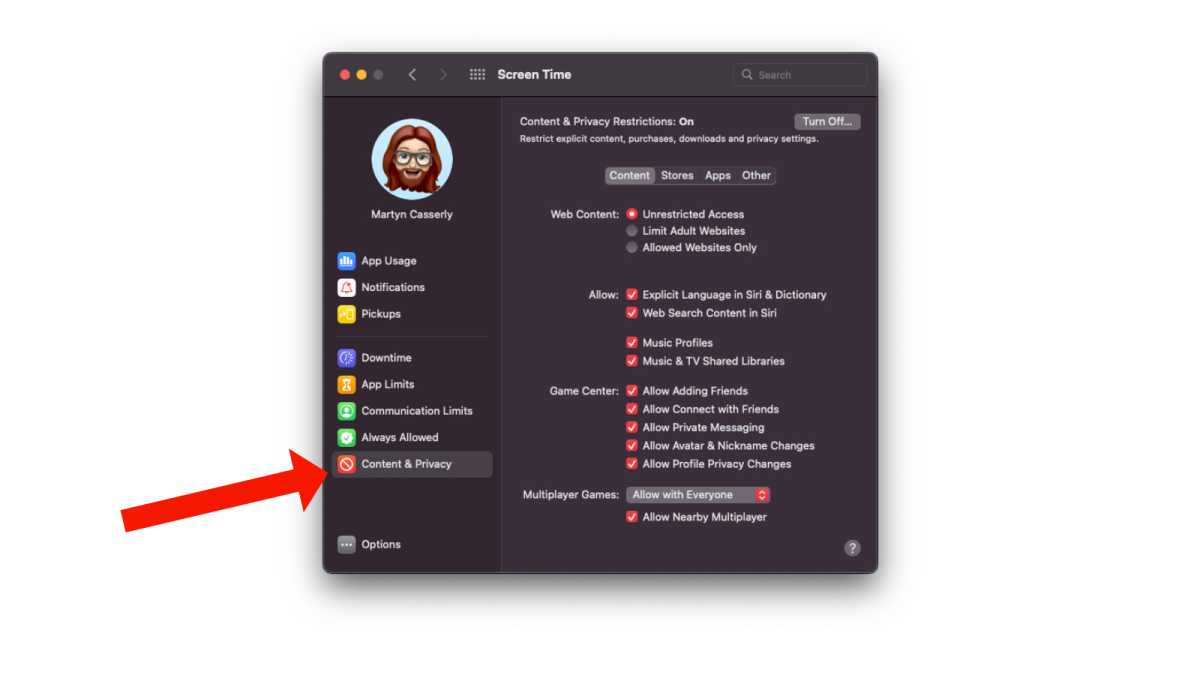
The final category in the left-hand column is Content & Privacy, and this is probably the most important section to address if you want to protect your children.
Content & Privacy
The earlier features are more concerned with access and time limits, but this one lets you decide the type of content that your child will see. There are various granular settings that restrict adult websites and search results, explicit lyrics and words in movies and music, plus whether you want your child to play games online or not.
- Click Turn On… and enter the passcode.
- Select the limits you want to set, such as Limit Adult Websites, or Allowed Websites Only. If you choose Allowed Websites Only you will find a selection of child-friendly websites which you can add to.
- You can also deselect things like Explicit Language in Siri & Dictionary and restrict Game Centre activity.
Martyn Casserly
Best parental control apps for Mac users
If you want to exercise more control over how your child uses their Mac, or want features that also extend to Android and Windows devices, then there are a number of good third-party offerings available.
Qustodio
Qustodio Parental Control Software
Martyn Casserly
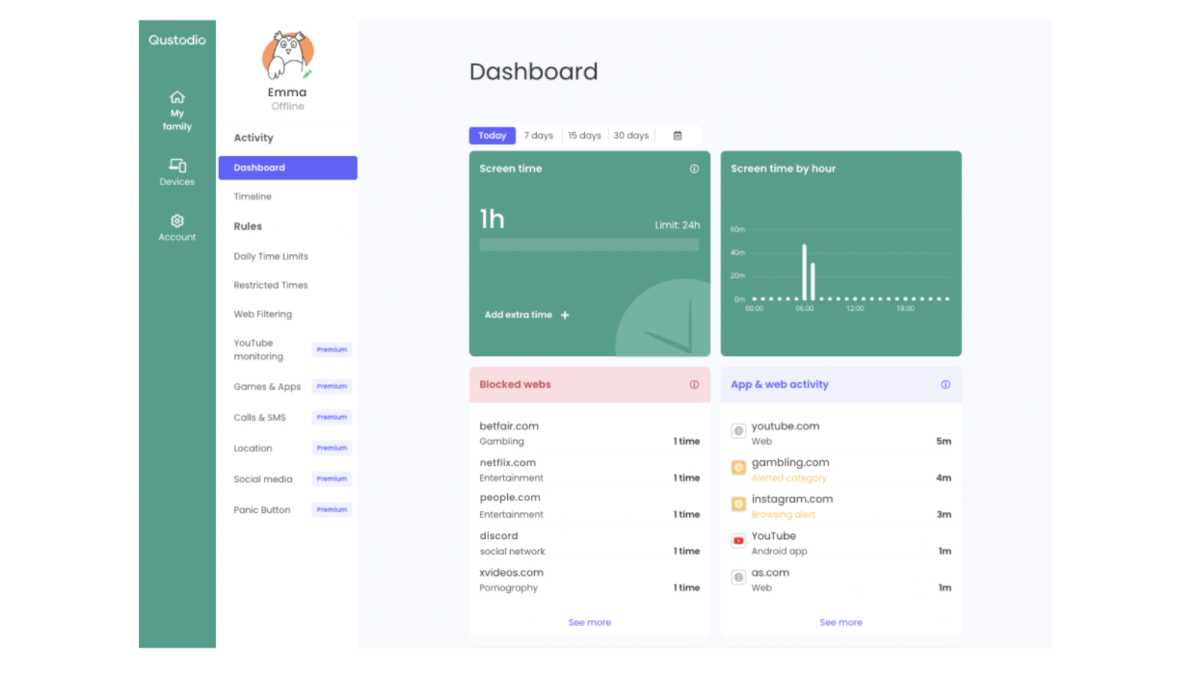
One of the most popular parental controls programs around is Qustodio. This is a powerful suite of tools that allows you to set time limits on when your little ones use their devices, restrict access to games and apps that you specify, monitor their browsing activity and YouTube views, track their physical location, get real-time alerts when they try to access blocked sites, plus it works across all the major platforms – iOS, macOS, Windows, Android and even Amazon Kindle devices. There are various subscriptions available, ranging in price depending on how many devices you want to cover. The basic package includes 5 devices and costs $54.95/£39.95 per year.
You can check out the various options and features at the Qustodio website.
Net Nanny
Another stalwart in the parental controls space is Net Nanny. This has been around for quite a while, starting off as as purely Windows product, but over the years its grown to encompass iOS, macOS, ChromeOS, Android, and Kindle Fire, so you should be able to prevent your kids seeing inappropriate content no matter which device they are using. The service offers a standard set of features, including screen time limits, a pornography blocker (along with other content), alerts that let you choose whether to allow access to sites, real-time monitoring of browsing behaviour and internet activity.
You can choose from a single subscription for your Mac ($39.99/£32 pa), 5 devices ($54.99/£45 pa) or 20 devices ($89.99/£73 pa). For more information, check out the Net Nanny site.
FamiSafe
Wondershare has created a solid offering with FamiSafe. This software covers all the bases, with web filtering, location tracking, screen time limits, alerts when innapropriate content is spotted on your child’s device, plus several other useful features. It works across macOS, iOS, Windows, Android, Kindle Fire, and has picked up a fair few awards over the years.
Various subscriptions are available, with the 10 devices for $60.99/£49 a year being the best deal. Check out the FamiSafe site for more information.
With either the built-in macOS parental controls or third-party software (or indeed a mixture of both) in place your child should now be able to use their Mac without encountering any of the nasty stuff online, but of course it’s no guarantee so be sure to keep an eye on them and teach them about the dangers that lie among the benefits of modern computing.
If you want to add even more protection to the device your child will be using, then be sure to also read Best parental control apps for iPhone and iPad.
from Macworld.com https://ift.tt/z2pX80V
via IFTTT